As fashion designers, whether freelancers, small brand owners, or part of a big label, we’re always on the lookout for ways to up our efficiency game. Especially when it comes to Adobe Illustrator, where we tend to spend a lot (most… ALL?) of our time.
In our last post, we explored the magic of Adobe Illustrator shortcuts, those quick keystrokes that make your fashion CAD workflow faster and life easier.
Now, buckle up, because we’re about to supercharge your Illustrator game with the use of Illustrator brushes.
Brush Brilliance – Streamline Sketching with Custom Adobe Illustrator Brushes
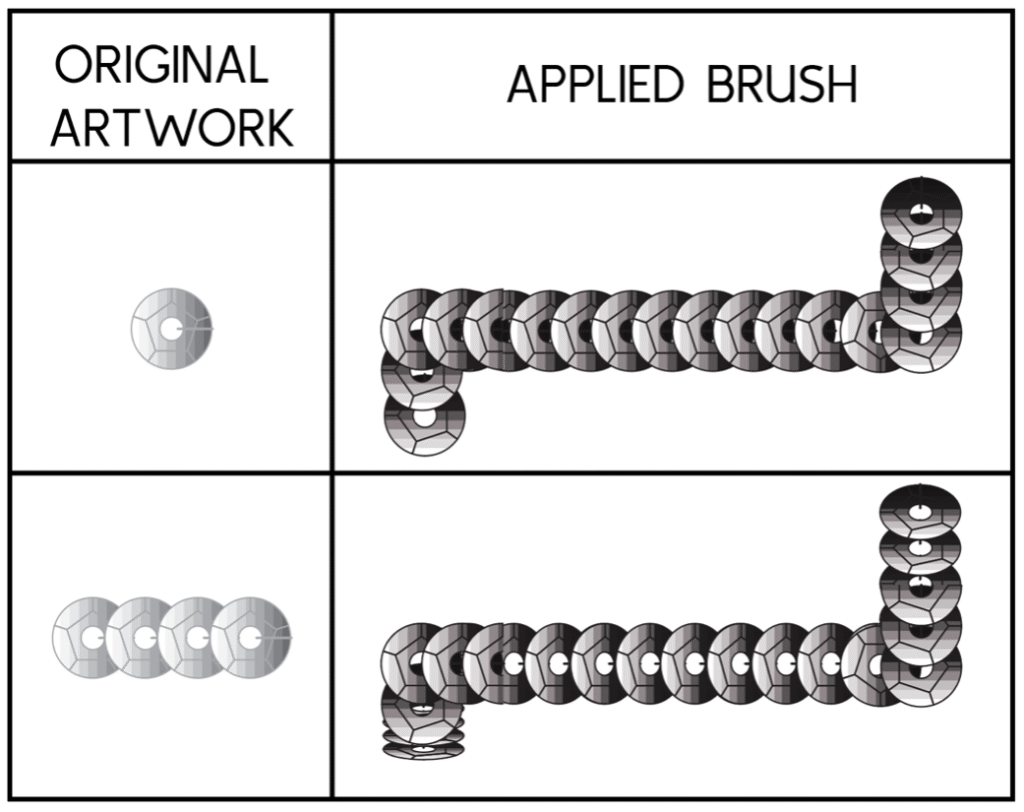
Sketching fashion illustrations in Adobe Illustrator often requires stylized strokes. Think trims, stitching lines, or fine details that make your sketches more realistic. But creating these details manually can be tedious and time-consuming. Who has time for that? Not you!
Good news! We have a secret weapon — AI brushes! (And no, we’re not talking about artificial intelligence… Rude that it stole the “AI” acronym, right? Adobe Illustrator is the OG AI.). These Adobe Illustrator brushes will save you hours and rescue you from repetitive sketching.
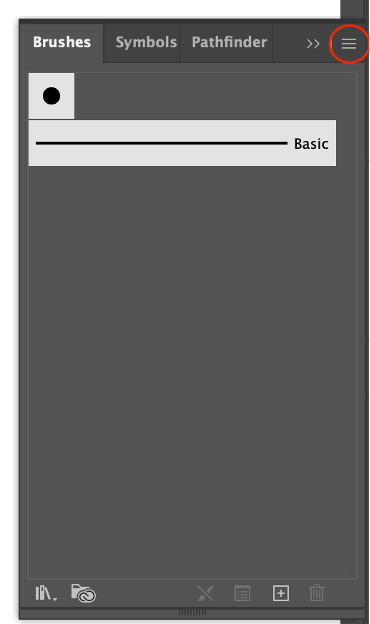
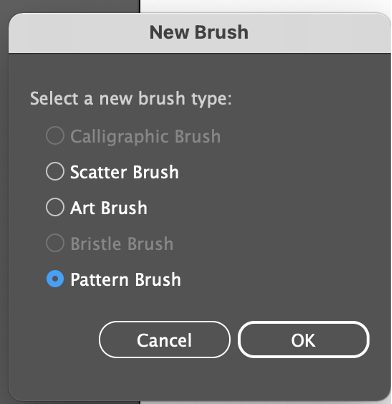
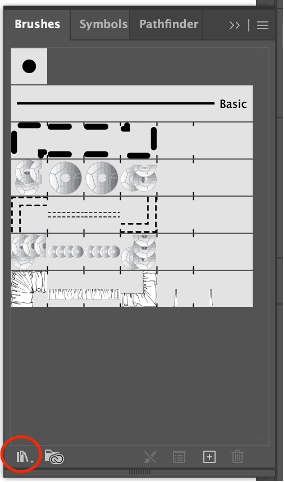
Below you’ll learn exactly how to create your own custom brush library in Illustrator. Yay!
How to create brushes in Adobe Illustrator
Example 1: A Twin Needle Topstitch Brush
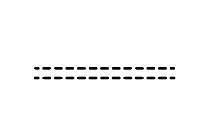
1. Start simple: let’s create a brush for a twin needle topstitch. Two dashed lines that mimic real topstitching.
2. Draw a short line with no fill, black stroke, and 1pt stroke weight.
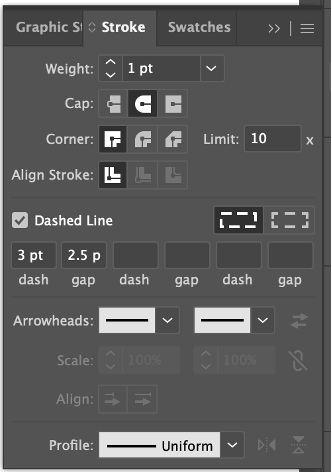
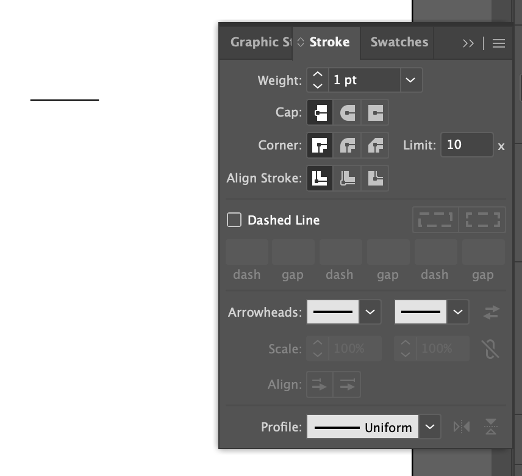
3. Open the Stroke panel, enable Dashed Line, and set your dash and gap lengths as needed.
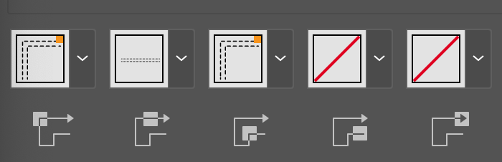
4. For realistic stitching, set the stroke cap to Round Cap so the “thread” appears to go into the fabric. Looks more realistic than the blunt square ends.

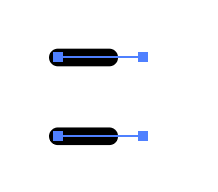
5. Duplicate the line and offset it so you have two identical dashed lines, parallel to each other.

6. Shorten each line so it only contains one dash and one gap. This ensures a seamless repeat.

7. Select both lines and drag them into the Brushes panel, or click the panel menu and choose New Brush.


8. In the New Brush dialog, select Pattern Brush and click OK.

9. In the Pattern Brush Options panel:
– Give your brush a name.
– For Outer/Inner Corners, choose Auto-Centered.
– Leave the ends set to None.
– For Colorization, choose Hue Shift with the key color set to black.


10. Click OK to save.
To use your newly created twin needle topstitch brush, simply select the stroke you want to apply this brush to and click on the brush in the Brushes Panel.
I know this seems like a lot of work for a basic stitch line, but once this brush is created you can reuse it on any sketch with just one click! This saves you from having to copy/paste and offset your dashed lines to create a twin needle topstich on your sketches. Just select the line that you want to be a twin needle and select your brush. Voila!
Simple stitch lines like this are an easy introduction into creating brushes. But most brushes you want to create are a little more complicated. Let’s create a sequin trim together. Who doesn’t love sequins?!
Example 2: Creating a Detailed Trim Brush
1. Create the artwork that you want to turn into a brush. For trims such as sequins, it’s best to use only a small section of the artwork, (one sequin in this case) instead of a full row. This keeps the repeat smooth on short or curved paths.
As you can see in the example below, when the repeat is only one sequin, the shorter line segments maintain a better ratio than the repeat that is 4 sequins long in the original artwork:

Also note, Pattern Brushes cannot contain gradients. For the fill of this sequin, I split the sequin into multiple sections and applied a grey fill to each section in incrementally darker shades for a more realistic look.
2. After original artwork is completed, draw a transparent rectangle around the sequin to define the repeat area. For the brush to have overlapping sequins, the repeat box should start mid-sequin and end at the right edge.

3. Set the stroke and fill color of the rectangle to [None] and send it behind the artwork.
4. Select both the artwork and the transparent box, drag them into the Brushes panel, or select “New Brush” from menu in Brushes Panel.
5. Select “Pattern Brush” and click OK.
6. In the “Pattern Brush Options” panel, give your brush a name.
7. When you go into the drop-down menu for the Outer Corners and Inner Corners tiles, you’ll notice none of the Illustrator generated corners look realistic, therefore we need to create a custom corner tile.

8. Click ok to exit the “Pattern Brush Options” panel.
9. Using your original artwork, create the corner artwork.
10. Again, draw a transparent rectangle to set the edges of the repeat area and send to the back.

11. Select the corner artwork and transparent box and drag them into the Swatches panel.
12. Go back to the Brushes panel. Make sure you have no artwork in the document selected and double click on your Sequin Brush to re-open the “Pattern Brush Options” panel and continue editing the options.
13. Now, you can go into the Outer and Inner corners dropdown menus and select the sequin corner artwork you just dragged into the Swatches Panel.

14. Set the Colorization method set to “Hue Shift” with the key color set to one of the greys in your artwork and click OK.

Imagine having to copy/paste that sequin onto your garment sketch. No thanks! Setting up a custom brush like this will save you so much time in the long run.
More Complex Examples: End Tiles
A lot of working with brushes is playing around with the settings until you find what works best for the particular brush you’re creating.
For instance, for this ruffle brush, the auto-generated Corner tiles worked well, but I needed to create end tiles for the start and finish of the brush.

Follow the same steps as before to create the brush first. Next create the end tiles:
1. Create the end artwork.
2. Add a transparent repeat box (same height as your brush repeat).
3. Drag both the artwork and transparent repeat box into the Swatches panel.
4. Reopen the brush options and apply the custom end swatches to the Start and End Tiles.

The finished brush looks like this:

Pro-Tips for Better Brushes
1. For brushes that hang below the stroke line, such as ruffles or fringe, make your transparent repeat box taller, and position the artwork halfway down. This keeps the top of your brush aligned to the stroke path.

Here is what the ruffle brush applied to a stroke looks like:

If your brush appears on the wrong side of the stroke line, it’s an easy fix. Select the path, go to the Brushes panel menu, open Stroke options (Pattern Brush) and tick Flip Across. If you reflect your entire sketch, you may need to re-flip the brush for mirrored lines.


Saving Your Custom Brush Library
After putting in all this effort into creating these brushes, you’ve got to save them into your brush library so that you can use them in any Illustrator file!
1. Make sure all brushes you want to save are loaded in your Brushes panel.
2. Click the hamburger menu in the top right-hand corner of the Brushes Panel and select “Save Brush Library”.
3. Save in Illustrator’s default Brush Library folder so your custom brushes show up automatically in any new file. Or pick your own location to save.
4. In any Illustrator file, go to the Brush Libraries Menu at the bottom left of the panel, then choose User Defined to load your saved brushes.

Preloaded Brushes in Tech Pack Wizard Plugin for Adobe Illustrator
At TPW, we know how essential brushes are to a fashion designer’s workflow. That’s why the Tech Pack Wizard plugin comes preloaded with brushes for stitching lines, zippers, gathers and more! So you can sketch faster, smarter and with fewer clicks.
Making fashion designers’ lives easier is what we do best!