This guide explains how to create, assign, and manage Primary Sketches in the Tech Pack Wizard panel.
Primary Sketches serve as the main sketches for a style and act as the reference point for linked Detail Sketches.
Step 1: Open the Primary Sketches Section
Open the Tech Pack Wizard panel (Windows > Extensions > Tech Pack Wizard).
Locate the Primary Sketches section at the top of the panel.
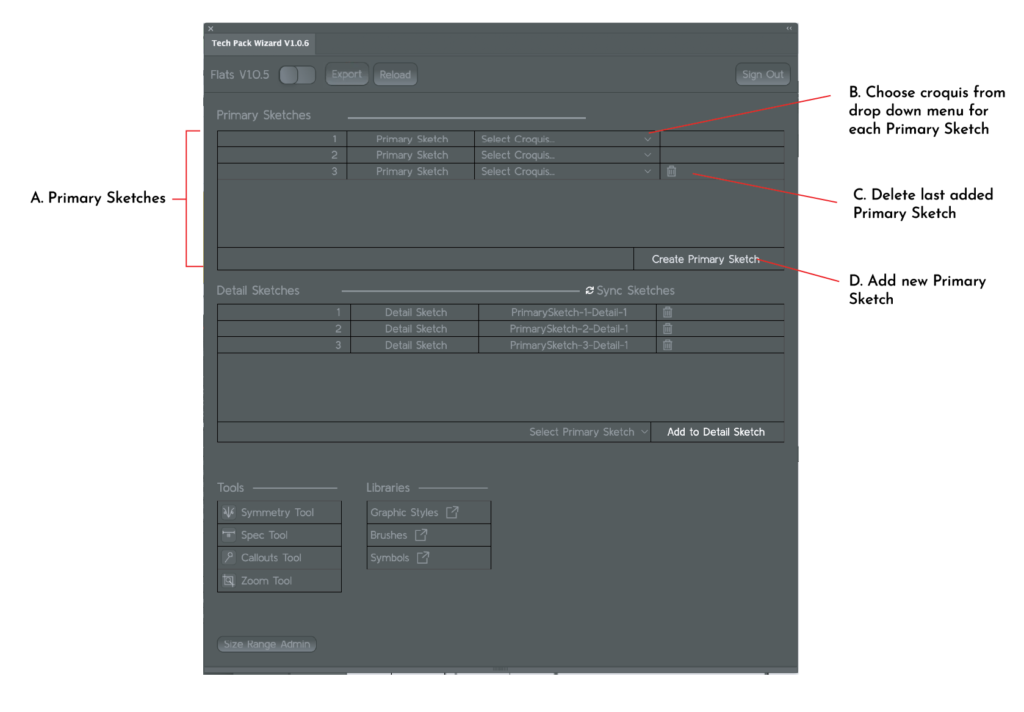
Step 2: Create a Primary Sketch
Click Create Primary Sketch.
A new Primary Sketch row will be added to the list.
Each Primary Sketch represents a main view of the style (for example, front or back).
Step 3: Assign a Croquis
In the Primary Sketch row, click the Croquis dropdown menu.
Select a croquis from the list of preloaded options, import your own croquis or leave as No Croquis selected.
The selected croquis will be used as the base for sketching and will be locked on the artboard.
Step 4: Add Additional Primary Sketches
Click Create Primary Sketch again to add another Primary Sketch.
Repeat the process to assign a croquis to each new Primary Sketch.
You can add multiple Primary Sketches as needed for the style.
Step 5: Delete a Primary Sketch
Click the Delete icon next to the Primary Sketch you want to remove.
Only the most recently added Primary Sketch will be deleted.
Deleting a Primary Sketch also removes any linked Detail Sketches.
Step 6: Review Primary Sketch Order
Primary Sketches are listed in the order they are created. This order is used throughout the tech pack and determines how linked Detail Sketches are organized.
Next Steps
After creating Primary Sketches, you can:
- Add Detail Sketches linked to a Primary Sketch
- Use sketching tools to draw and annotate
- Add specifications and callouts
- Export the tech pack when complete
Refer to the Add and Manage Detail Sketches guide for next steps.